An AI tool like Claude Code gives you solid general-purpose capabilities out of the box. To make it truly indispensable, add the layers that teach it who you are, how you work, and what you do.
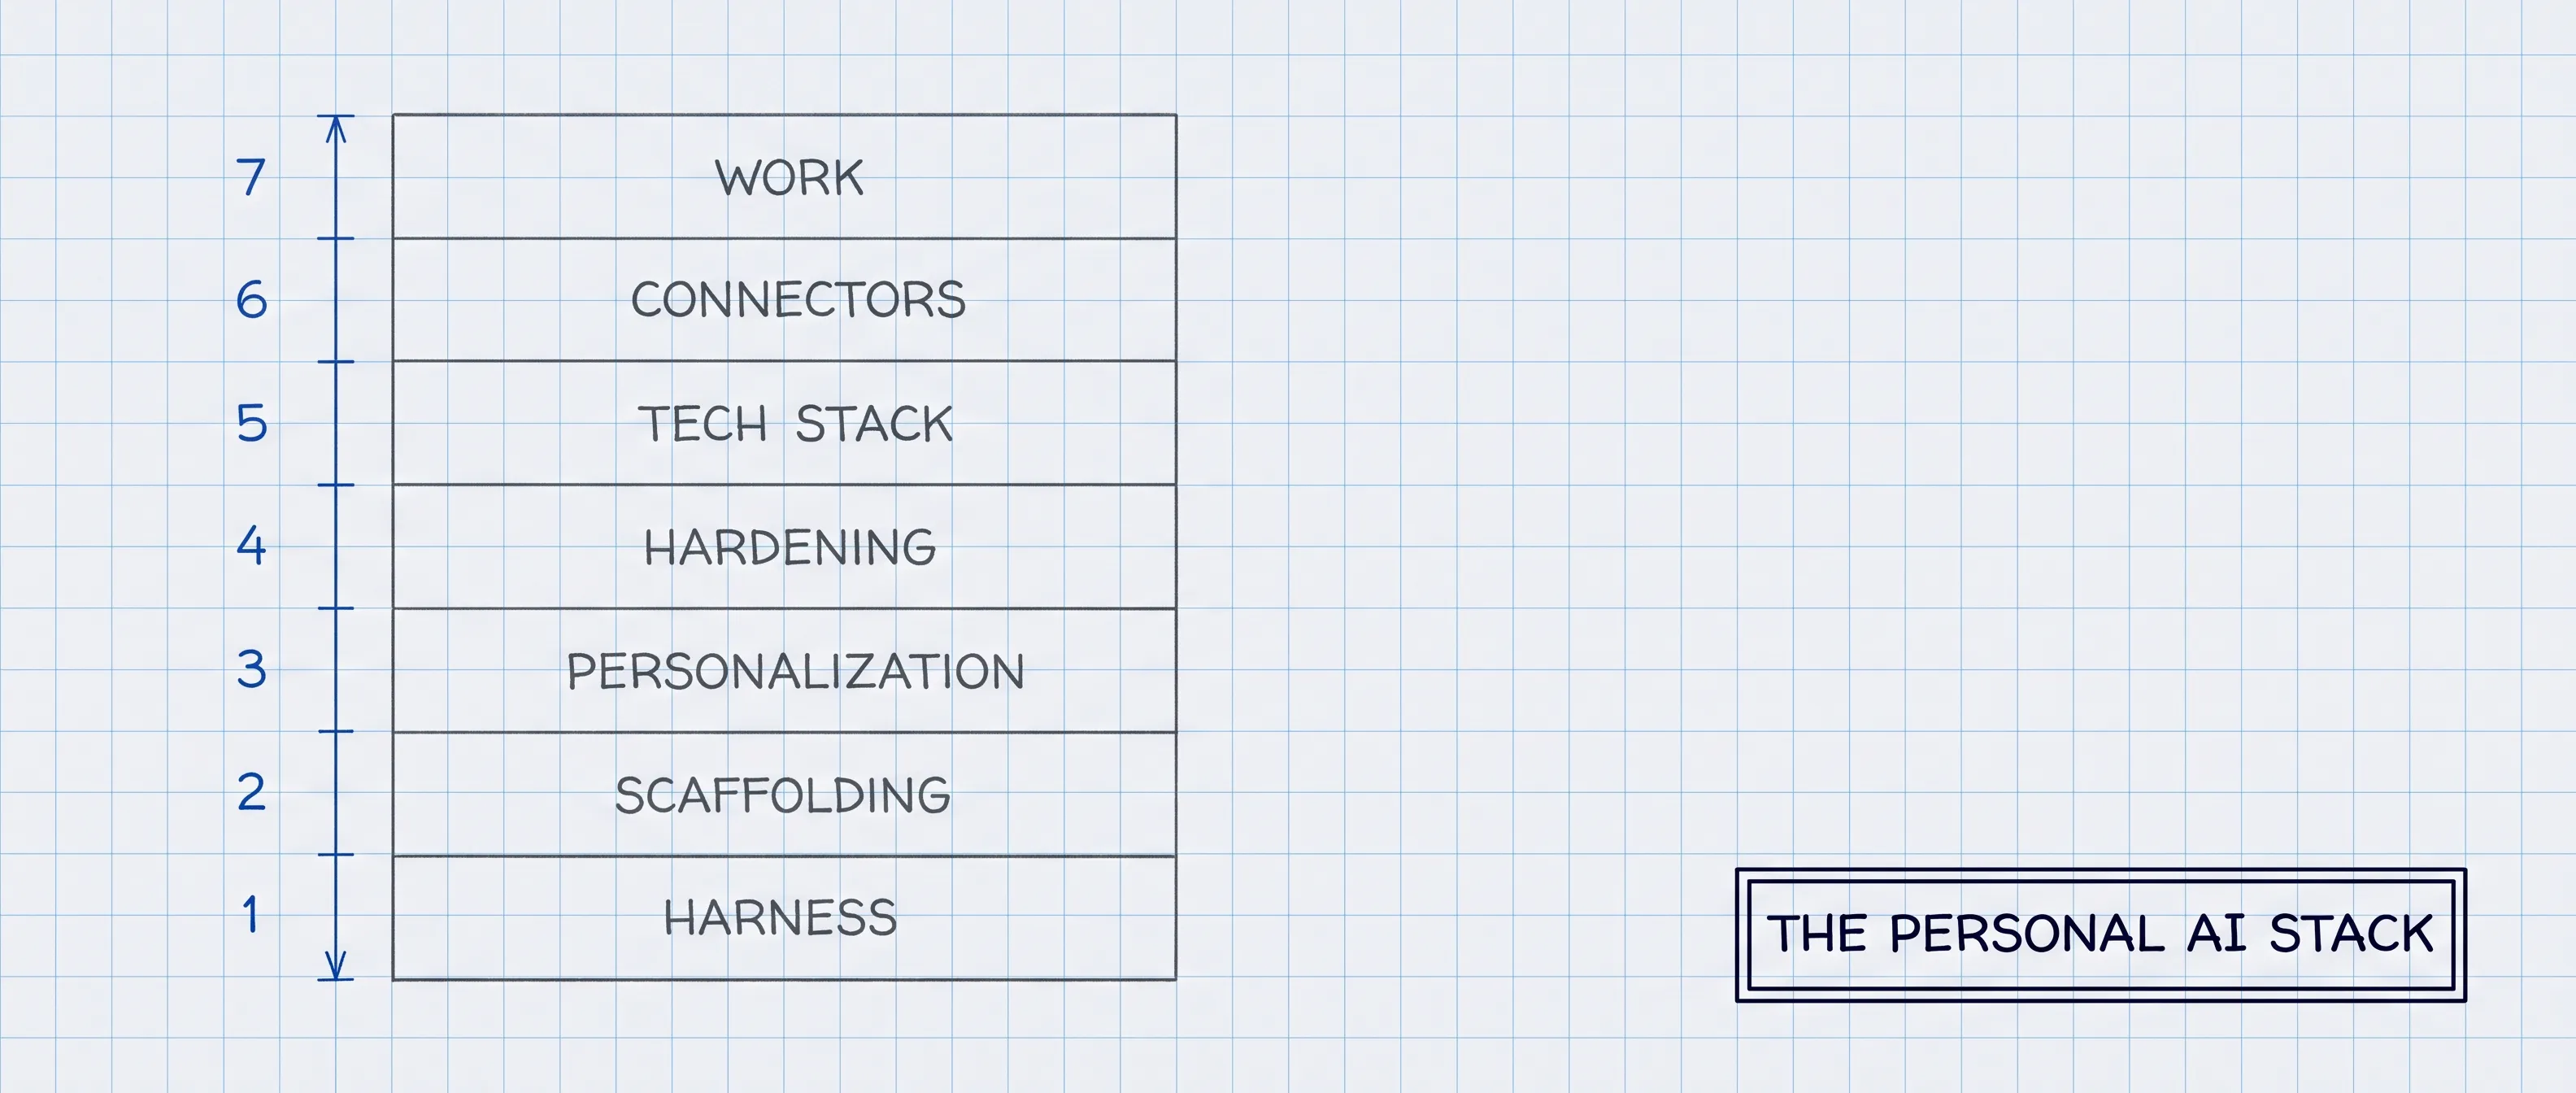
The Personal AI Stack is my seven-layer model for shaping a capable AI tool such as Claude Code around your projects, tools, and knowledge. I’ll walk through each layer, so you can choose which ones to add to your own setup.
| Layer | Name | Examples |
|---|---|---|
| 7 | Work | Your Projects, Knowledge |
| 6 | Connectors | MCP Servers, CLIs |
| 5 | Tech Stack | Files, AI-Friendly Services |
| 4 | Hardening | Security Tweaks |
| 3 | Personalization | Your Files, Agent Instructions |
| 2 | Scaffolding | Skills, Frameworks, Optimizations |
| 1 | Harness | Claude Code, Ghostty, Maestro |
The examples center on Claude Code, but you can adjust the stack to your own preferences.
I’ve been using the Personal AI Stack to expand and deepen my work. For example, it helped me ship a new version of REMnux with its MCP server and profile the RSAC Innovation Sandbox finalists. And my endpoint security startup guide and security product creation framework would’ve taken many more hours of browsing and note-taking without it.
Layer 1: Harness (Claude Code, Ghostty, Maestro)
The harness is the client AI software you use to interact with an LLM. Claude Code will be the tool I use as the basis for my examples. Other popular options include Codex, Gemini CLI, and OpenCode. Sometimes such tools are called AI agents or AI orchestrators; the terminology is ambiguous and overlapping.
You install the harness on your workstation and give it access to your local tools and files. That makes it much more capable than AI providers’ web-based chat interfaces.
Sign up for a Claude subscription, then install Claude Code. It’s a command-line tool, and this is the approach I recommend for technologists. If you don’t like using a terminal, you can download the Claude desktop app. Click its </> icon to use its built-in (but slightly hidden) Claude Code app.
If you’ll be using the command-line version of Claude Code on macOS or Linux, install Ghostty. It’s a better choice than the native terminal apps. You don’t need it if you’ll use Claude Code solely in the Claude desktop app.
If you find yourself running several Claude Code sessions at once, Maestro will launch and manage multiple Claude Code instances side by side. Think of it as a supercharged alternative to running them in Ghostty or the Claude desktop app.
By the way, don’t get hung up on the word “code” in the name Claude Code. It’s useful for any scenario where you want a customizable harness for Anthropic’s AI models.
Layer 2: Scaffolding (Skills, Frameworks, Optimizations)
The Skills your AI harness supports offer a native way to expand its capabilities. For example, Anthropic publishes its official Skills, which include the ability to work with PDF and Microsoft Office files. You can add them through Claude Code’s /plugin command.
Daniel Miessler’s LifeOS project (formerly PAI) amplifies Claude Code, making it smarter and attuned to your specific needs. The name stands for “Life Operating System,” Daniel’s vision for an AI that goes well beyond scaffolding. LifeOS installs as a Skill that enhances your harness. You don’t need to embrace his full vision to benefit from LifeOS. Install it whole or borrow from it selectively.
As Anthropic improves Claude Code, it absorbs some of the capabilities LifeOS offers. Daniel keeps advancing LifeOS, staying a step ahead of what’s possible with Claude Code alone. For example, LifeOS gives Claude Code an adaptive approach to solving problems that Daniel calls The Algorithm, a method he designed to “hill-climb toward the ideal state using testable criteria.”
LifeOS includes Skills that extend Claude Code’s capabilities. For instance, the Council Skill pressure-tests your document, code, or idea from multiple perspectives. To do this, the Skill creates different personas with expertise relevant to your task, gathers their critique and ideas, and has them debate each other before unifying their perspectives.
To install LifeOS, hand the install page to Claude Code and tell it to set things up, or run the one-line shortcut from the same page. During setup, it interviews you about your goals and preferences. Don’t worry if you aren’t sure about your answers, since they’re easy to adjust later. Many of its parts are optional, such as the status line, the Life Dashboard, and the agent library, so you can turn on only what you need.
If the life-management side isn’t for you, borrow selectively with a prompt like this:
Read https://ourlifeos.ai/install and install LifeOS for me selectively. I want the working-level pieces, such as the Skills library and the Algorithm. Skip the life-management components, including the Pulse dashboard, voice, and the Telos interview. Show me what you plan to add before you add it, confirm nothing in my existing setup gets overwritten, and ask before touching hooks or settings. When you finish, list what you installed and how to remove each piece.Several add-ons can make Claude Code more efficient by keeping unnecessary content out of its context window. rtk compresses the output of routine shell commands, so they consume fewer tokens. context-mode keeps the bulky output of file reads, web fetches, and MCP server responses from reaching the model; it holds that data in a local index and gives Claude Code only the part it needs. Headroom is a lighter alternative to context-mode; it does less, so it’s less likely to interfere with how Claude Code works.
Treat Skills like you’d treat any third-party software that might turn out to be malware. Only install Skills from trusted authors and sources.
Layer 3: Personalization (Your Files, Agent Instructions)
Your AI setup is meant to be an extension of you, which means it needs to know about your goals, tools, likes, and dislikes. Claude Code picks up this context from files such as CLAUDE.md and the documents you point it to. This can feel personal, and that’s the intent. It’s what will allow Claude Code to become your Claude Code, so it can code, research, and write the way that works best for you.
LifeOS gives this personalization a structure. It refers to its understanding of who you are as a “Telos,” which it captures in a series of markdown-formatted files. You can edit them yourself, but it’s easier to let Claude Code do that. Here’s a sample prompt you can give Claude Code for this. Replace [FILES] with paths to your resume, papers, notes, apps you’ve built, anything that captures how you think and work.
Help me set up my personal TELOS without overwhelming me. Use the Telos Skill. Start by reviewing these files for baseline context: [FILES]. Review silently, then interview me for 20-30 minutes, one question at a time, to populate only four files: MISSION.md (2-3 things my life is actually about), BELIEFS.md (5-7 specific beliefs, not platitudes), BOOKS.md (5-10 books that shaped my thinking, and why), and WRONG.md (3-5 things I used to believe but don't, and what updated me). Let the baseline guide what to ask, skip, and probe deeper. If I answer generically, push me for the specific story or stake behind it. Keep entries honest, not aspirational.You can return to Claude Code later to work through the remaining Telos files. If you’re unsure what a file is for or how to approach it, ask it. You can also revisit your earlier Telos answers when life gives you something specific to record, such as a job role that changed, a goal that shifted, or a book that affected how you think.
Some of the Skills that come with LifeOS require API keys. For example, the Media Skill uses image-generation APIs to create illustrations and visuals. The Scraping Skill uses services such as Apify to access web content that would otherwise be hard to retrieve.
You can ask Claude Code to walk you through the process of setting up these keys based on your plans. Use a prompt like this:
Which LifeOS Skills need API keys? For each, explain what the Skill does, which API it uses, the approximate cost, whether there's a free tier, and why someone like me might or might not want it.Layer 4: Hardening (Security Tweaks)
By default, Claude Code asks for approval before running most tools. LifeOS pre-approves most shell commands, file reads, and MCP tool calls, so you aren’t interrupted during normal work. It still requires confirmation for operations that can cause real damage, such as wiping a disk or force-pushing over a code branch.
Anthropic offers auto mode for tool approval, which uses an AI classifier at runtime instead of static rules. Its approach is compatible with LifeOS, so you can enable both if you want to experiment.
A security guidance plugin from Anthropic reviews the code Claude Code writes for common vulnerabilities, such as injection flaws and unsafe deserialization. It fixes what it finds during the session, before you open a pull request. Install it with the /plugin command, and it runs on its own with nothing to invoke. You can also give it a plain-language threat model and checklist, so it checks the code against your own rules.
Trail of Bits published their recommended Claude Code configuration, which layers hardening on top of LifeOS’s defaults. If you don’t want to follow the guide yourself, point Claude Code at that repo and ask it to walk you through the options and recommend what’s worth applying based on how you work:
Review https://github.com/trailofbits/claude-code-config and walk me through the hardening options. For each one, explain the tradeoff and recommend whether I should apply it based on how I use Claude Code.Trail of Bits settings worth paying attention to include:
- Block access to sensitive files: Prevents Claude Code from reading cloud provider credentials, package manager tokens, shell configuration files, and more.
- Disable auto-loading of project MCP servers: Stops cloned repositories from auto-registering MCP servers on your system, which protects against supply-chain attacks through malicious .mcp.json files.
- Disable telemetry: Stops Claude Code from sending operational data such as session IDs, account UUIDs, error reports, and feature flag states back to Anthropic.
Another hardening kit worth a look is aka-claude-tools, which layers similar defenses onto a profile of its own. As with the Trail of Bits config, you can point Claude Code at it and have it explain each piece before you apply anything:
Review https://github.com/alsoknownassecurity/aka-claude-tools and walk me through its additions. For each one, explain what it guards against and recommend whether it's worth applying based on how I use Claude Code.Two of its ideas go beyond the settings above:
- The first is running risky work in a separate profile. Claude Code can keep more than one configuration, each in its own folder and launched by its own command, so you can run a hardened or throwaway profile next to your everyday one. It gives you a place to try an unfamiliar Skill or MCP server before you trust it in your main setup, which is a safer way to act on the caution about untrusted Skills from earlier in this guide.
- The second is watching what leaves your machine, not just what your tools can read. The settings so far block Claude Code from reading your credentials, and LifeOS already scans the shell commands it runs for outbound secrets. Neither one watches the agent’s own web search and fetch tools, which can carry a secret out in a query or a URL. To cover that path, have Claude Code add a small hook that checks each web request and stops one that contains a secret before it’s sent. The aka-claude-tools’ leak-guard is a useful reference for the patterns:
Add web-egress secret scanning to my Claude Code setup. Using leak-guard from aka-claude-tools as a reference, add a hook on the WebSearch and WebFetch tools that blocks any outgoing query or URL containing a secret, such as an API key or token, before the request is sent. Keep it self-contained, tell me what it catches and what it misses, and change nothing else.AI agents can leak API keys and other secrets, so it’s worth taking steps to secure the keys on your workstation. The Trail of Bits hardening can block reads of common credential paths as a defensive layer. In addition:
- Consider using a vault that supplies secrets at runtime. 1Password Environments is one option to keep API keys out of your project folders.
- Review Anthropic’s API key best practices. Their guide covers spending limits per key, passing secrets via environment variables, and scanning your repositories for leaked secrets.
- Inventory what’s exposed on your workstation. bagel checks your machine for credentials and insecure settings, including AI CLI credential files, cloud provider keys, and unsafe Git or SSH configurations.
If you install npm packages, disable their install scripts to neutralize a common supply-chain vector. The postinstall script behind the s1ngularity attack ran the moment a developer installed a malicious package. Set ignore-scripts=true in your .npmrc, and npm skips those install scripts, so simply installing a package no longer runs them. Re-enable it per project only when a package needs its build step.
By the way, Claude Code adds itself as a co-author on every commit and pull request it helps you make. If you’d rather not advertise its involvement, whether for privacy, employer policy, or cleaner attribution, ask Claude Code to set the attribution field in ~/.claude/settings.json with empty strings for commit and pr.
Running AI agents creates many security concerns, such as prompt injection through files or web pages the model reads, and the model taking actions you didn’t intend. A deeper dive into that topic requires a separate article. The hardening above introduces some safeguards, but doesn’t cover the full threat model.
Layer 5: Tech Stack (Files, AI-Friendly Services)
Your tech stack determines how effective your AI will be. Start with the basics by organizing your projects in directories, one per project. To keep each project’s files under version control, use Git. It’s a system that works especially well for source code, but it’s also convenient for any text files.
An easy way to keep Git-organized files available is to store these projects in repositories on GitHub (or alternatives such as GitLab and Bitbucket). This lets Claude Code modify, track, and roll back your changes when necessary. Remember to tightly control access to your GitHub account (2FA is a must) and to set your non-public projects to be private.
Modern AI tools work best with text-based files, including Markdown, JSON, and YAML. An LLM can read, edit, and re-render these formats more precisely than Microsoft Word or Google Docs. You can still work with traditional formats, but workflows run more smoothly when your source content starts as plain text. Ask Claude Code to convert it into PowerPoint, PDF, or whatever your destination requires.
If you’ll be building software using AI, make sure the platforms and services you use are designed for programmatic interaction:
-
AI-friendly infrastructure such as Cloudflare’s developer platform (Workers, Workers AI, R2, D1, etc.) gives you primitives that Claude Code can deploy and modify directly through APIs, MCP servers, and command-line tools. This is much more efficient than having your tools interact with a traditional VM via SSH or navigate a graphical user interface designed for humans.
-
Services with clean, well-documented APIs let Claude Code do work that would otherwise require clicking through web dashboards. Examples include Resend for email, Stripe for payments, and Linear for project tracking. Choose tools that expose what you need as an API call.
Layer 6: Connectors (MCP Servers, CLIs)
MCP servers and command-line tools (CLIs) let Claude Code reach beyond local files into services that expand its capabilities and let it act on your behalf. MCP servers expose structured tools with their own authentication, while CLIs inherit your shell’s permissions and need to be trusted the same way as any local executable.
Anthropic offers ready-made connectors for services such as Google Drive, Gmail, Cloudflare, GitHub, Slack, and more. Authenticate one using the Claude website, and it becomes available in Claude Code automatically.
Beyond Anthropic’s managed connectors, MCP servers can also be added to Claude Code directly. SaaS vendors are starting to offer MCP-based access to their services.
Add MCP servers to Claude Code based on the services you want it to interact with, but make sure the services come from trusted individuals and companies, like you would with any software. For example, these MCP servers will help your AI agent search and access web content:
- Exa so Claude Code can search the web more effectively than using human-centric tools such as Google.
- Bright Data for accessing websites that block direct AI tool access; this is useful for LifeOS’s Research and Scraping Skills.
As an alternative to MCP, some services offer command-line tools that you install locally to let your AI agent interact with them. For example, agent-browser is designed to let your AI agent interact with a headless web browser. LifeOS comes with Skills that tell Claude Code when and how to use it.
If you’d like to let Claude Code access your primary Chrome browser so it can use your authenticated sessions, enable Chrome’s remote debugging feature. There are several ways to “teach” Claude Code to interact with Chrome this way. The lightest is to install Petr Baudis’ chrome-cdp-skill; you can direct Claude Code to do that using a prompt like this:
Install https://github.com/pasky/chrome-cdp-skill as a Skill, in a way that lets a future session update it from the same source.Be aware that this carries security risks, such as prompt injection from sites you visit. One mitigation is to give Claude Code a dedicated Chrome profile where you sign in only to sites it needs.
Look for MCP servers and CLI tools from trusted sources based on your work. For instance, if you’re using DigitalOcean, you’ll want to set up their MCP server. And maybe you’ll benefit from my own MCP server, which gives your agent access to hundreds of my blog posts as well as guidance for writing incident reports and evaluating product strategies.
Layer 7: Work (Your Projects, Knowledge)
Your past work is the most useful context you can give your AI, carrying your voice, decisions, and patterns. Point it at prior projects and documents when starting new ones, and the output will reflect your thinking. The more projects you’ve built, the richer that context becomes.
As you complete a project, direct Claude Code to capture details about it in a dedicated file, such as README.md, documenting your objectives, designs, and decisions. When starting a new project, refer your AI agent to your past work and your knowledge base so it starts strong and meets your expectations.
Also, consider creating a private knowledge base with your favorite books, frameworks, and reference materials that you want to make available to Claude Code as you work. This knowledge base can be a collection of documents stored as regular files. Alternatively, set it up as a local database, for instance, using the MCP Local RAG tool. Andrej Karpathy’s LLM Wiki is another approach to making your personal knowledge available to the agent.
You, the Next Layer
The Personal AI Stack describes a set of layers that create a capable personal AI. The only missing layer is you. You’re the one who’ll take this setup from “Artificial Intelligence” toward “Actually Smart Intelligence.” Start building.