How You Can Set up Honeytokens Using Canarytokens to Detect Intrusions
Honeytokens are data or computing resources that exist solely to alert you when someone accesses them, offering intrusion detection with relatively low false positives. The open source Canarytokens application makes it easy to create tokens like trackable URLs, resolvable hostnames, and Microsoft Word documents that notify you when an adversary interacts with them.

A honeytoken is data or a computing resource that exists solely to alert you when someone accesses it. This type of a honeypot resource could take many forms, including a user account that no one should use, a file that no one should access, and a link that no one should click. The open source application Canarytokens, created by Thinkst Applied Research, makes it easy to experiment with this approach to detecting and tracking cyber-adversaries.
Here’s how you can generate your own Canarytokens and even set up your own dedicated Canarytokens environment.
What Are Canarytokens?
Thinkst sees honeytokens as a “quick, painless way to help defenders discover they’ve been breached (by having attackers announce themselves).” To accomplish this, you can use the open source Canarytokens web application to generate tokens such as:
- A URL an adversary might visit (a web bug)
- A hostname an adversary might resolve
- A Microsoft Word document an adversary might open
- An AWS key an adversary might try to use
When the intruder accesses or uses the honeytoken, Canarytokens will email you and share a few details about the event.
Quickly Generating Canarytokens
The easiest way to get a sense for Canarytokens’ capabilities is to use the version of the app that Thinkst hosts for free at canarytokens.org. The site lets you generate and monitor honeytokens without setting up your own infrastructure:
The downside of using the hosted Canarytokens version is that you give up control over the data the app generates. Also, you cannot customize the domain for tracking tokens’ activities (adversaries might know about canarytokens.org). For more control, you can deploy your own instance of the Canarytokens server.
Deploying Your Own Canarytokens Server
If you’d like to retain full control over your honeytokens, set up your own Canarytokens server. This is a relatively straightforward process, though it does require registering a domain name in addition to installing Canarytokens software on an internet-accessible system.
Create a VM in a Public Cloud
You can host Canarytokens on an inexpensive Linux system in a public cloud. I like DigitalOcean (the link includes my referral code) for this in part because it offers a capable virtual machine for as little as $5 per month. You can start by deploying a DigitalOcean “droplet” running Ubuntu in a few clicks. For this draft we’ll use Ubuntu 20.04:

When starting to experiment with Canarytokens, you select the least expensive plan and specifications. Unless you have specific requirements in mind, it’s OK to select defaults to create your virtual machine.
Make a note of your new VM’s public IP address. Once it starts up, log into it.
Install Docker in the VM
After logging into your VM, execute the following commands to prepare for installing Docker and other Canarytokens dependencies:
apt -y update
apt -y upgrade
apt -y install apt-transport-https \
  ca-certificates curl gnupg-agent \
  python3-pip apache2-utils \
  software-properties-common
pip3 install -U docker-compose
curl -fsSL https://download.docker.com/linux/ubuntu/gpg | \
  sudo apt-key add -
Now confirm that you have the right GPG key with the fingerprint 9DC8 5822 9FC7 DD38 854A E2D8 8D81 803C 0EBF CD88. To do this, search the keyring on your VM for its last eight characters:
apt-key fingerprint 0EBFCD88You should see the key that matches the fingerprint above.
Continue installing Docker:
add-apt-repository \
    "deb [arch=amd64] https://download.docker.com/linux/ubuntu \
    $(lsb_release -cs) stable"
apt -y update
apt -y install docker-ce
Restart your VM (you can use the “reboot” command) to make sure all your updates go into effect, then log into it.
Register and Set Up Your Domain for Canarytokens
Before proceeding, you’ll need to register a domain name (e.g., “example.com”) that you’ll use exclusively for your Canarytokens app. Use your DNS registrar to set up this domain name and its subdomains like this:
- Create an “A” record for your domain to point to the public IP of your Canarytokens server. If you need to specify the resource name for the record, use ”@”.
- Create an “NS” record for a subdomain for which your Canarytokens server will be the authoritative DNS server, and point it to the domain name you specified in the “A” record.
- If you’re planning to use PDF honeytokens (compatible with Adobe Reder), create an “NS” record for some subdomain name (e.g., “docs”), and point it to the domain name you specified in the “A” record.
For example, if using example.com as your Canarytokens domains and if your VM’s public IP is 93.184.216.34, you’d create the DNS records such as:
| Name | Type | Data |
|---|---|---|
| @ | A | 93.184.216.34 |
| file | NS | example.com |
| docs | NS | example.com |
In the example above, “file” is the domain for which your Canarytokens will be the authoritative DNS server, and “docs” is the subdomain set up similarly for your PDF Canarytokens. You could change “file” and “docs” to whatever you want.
Install and Configure Canarytokens
Once you’ve registered the domain name and designated your VM as its DNS server, proceed with installing Canarytokens:
git clone https://github.com/thinkst/canarytokens-docker
cd canarytokens-docker
cp frontend.env.dist frontend.env
cp switchboard.env.dist switchboard.env
Next, modify the Canarytokens configuration files frontenv.env and switchboard.env like this:
Edit the frontenv.env file. Specify the domain name you’ve set up for Canarytokens as the CANARY_DOMAINS parameter. If you’ve registered a subdomain for PDF tokens, specify it as the CANARY_NXDOMAINS parameter; otherwise, set CANARY_NXDOMAINS to the same value as CANARY_DOMAINS, but know that in this case you won’t be able to generate PDF honeytokens.
Optionally, if you’d like Canarytokens to generate a geolocation map for your incidents, specify your Google Maps API key in the CANARY_GOOGLE_API_KEY parameter in frontenv.env and uncomment the corresponding line. Google charges for this key, so to get it you’ll need to enable billing in your Google Cloud account.
Edit the switchboard.env file. Specify the public IP address of your server as CANARY_PUBLIC_IP. Also, specify as CANARY_PUBLIC_DOMAIN the domain you used earlier for the CANARY_DOMAINS parameter and uncomment the corresponding line.
If you’d like to receive email alerts, set the parameters whose names start with CANARY_ALERT_EMAIL. You’ll also need to set up an account with Mailgun, Mailchimp Transactional Email (formerly Mandrill), or SendGrid (free tier available). Specify the details as the corresponding parameters and uncomment the appropriate lines.
If you aren’t going to set up HTTPS for your Canarytokens server, change PROTOCOL to “http”. Optionally, you can configure the CANARY_IPINFO_API_KEY parameter to specify your IPinfo (free tier available) access token, though as of this writing it’s unclear what additional capabilities you’ll get if you do that.
Adjust the Server’s DNS Configuration
Ubuntu systems listen on port 53 to supports its own DNS queries, which interferes with the attempts of the Canarytokens app to listen on the same port. To get around this, you’ll need to adjust the configuration of your server like this:
Edit the /etc/systemd/resolved.conf file and change the line that says:
#DNSStubListener=noTo say:
DNSStubListener=yesNext, point to the adjusted configuration file by executing the following commands:
cd /etc
rm resolv.conf
ln -s /run/systemd/resolve/resolv.conf .
service systemd-resolved restart
Start the Canarytokens App
You’re now ready to start the Canarytokens app. If you’d like to run the software in the foreground of your terminal, use the following command from the ~/canarytokens-docker directory:
cd ~/canarytokens-docker
docker-compose up
To run Canarytokens software in the background, use the following command instead:
docker-compose up -dThe first time you start the Canarytokens app, it’ll download the necessary code in the form of Docker images. This can about 5 minutes or longer, depending on the speed of your server’s internet connection. You’ll know it’s done when you see a message like: “Attaching to redis, frontend, switchboard, nginx.” The software will cache the Docker images, so the next time Canarytokens will starts quickly.
Once Canarytokens is running, use your web browser to visit the top-level URL on the server where you’ve activated Canarytokens (e.g., “http://example.com/”). You should see the Canarytokens interface for generating your very own honeytokens.
Running Your Canarytokens App
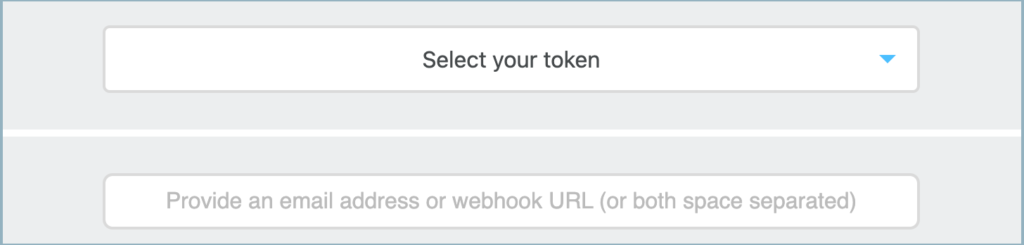
After connecting through your web browser to your Canarytokens server, generate some honeytokens. Consider starting with a simple web bug URL token, which will alert you when someone accesses the link.
When generating this token, provide the email address where you want Canarytokens to send the alert when the token is accessed. Also include the token’s description. Then click the Create my Canarytoken button.
The app will generate a unique URL for your token and present you with a page like this:
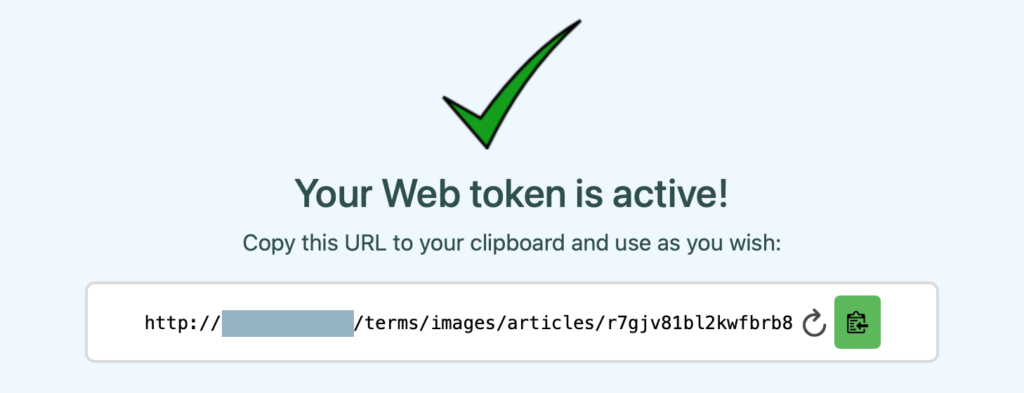
When someone accesses this URL, Canarytokens will email you an alert that will specify the IP address from which the token was accessed, along with other details like the browser’s User Agent string. The message will also include a link to your Canarytokens server where you’ll see the history of this token.
To terminate the Canarytokens app on your server, press Ctrl+C in the terminal where you’ve launched it, if you ran the app using the “docker-compose up” command. If you launched Canarytokens in the background using “docker-compose up -d”, run the command “docker-compose down” from the ~/canarytokens-docker directory.
Canarytokens saves its data in the dump.rdb file in the ~/canarytokens-docker/data directory. This way, it will remember your earlier tokens the next time you start the app. If you want to start with a clean slate, remove the file.
Password-Protect Canarytokens Management
By default, your Canarytokens pages for generating and managing tokens will be publicly accessible to anyone who comes across them. Take the following steps to password-protect them:
If you’ll be using HTTPS on your server (see below), go to the ~/canarytokens-docker/certbot-nginx directory from canarytokens-docker. If using HTTP, go to the ~/canarytokens-docker/nginx directory instead.
Now, generate a username/password pair you’ll use for managing your Canarytokens, replacing “admin” with your desired username, and supplying your desired password at the prompt:
htpasswd -c htpasswd adminEdit the nginx.conf file, adding the following two lines after the line that starts with the words location ~* (/generate
auth_basic "Restricted";
auth_basic_user_file /etc/nginx/htpasswd;
Next, edit the Dockerfile in the same directory, adding the following line after the one that starts with the words COPY nginx.conf
COPY htpasswd /etc/nginx/htpasswdNow, rebuild your Canarytokens images. To do that, first go to the ~/canarytokens-docker directory.
Next, you’ll be using HTTPS, run the following command:
docker-compose -f docker-compose-letsencrypt.yml buildHowever, if you’ll be using HTTP only, run the following command instead:
docker-compose buildYou can now start your reconfigured Canarytokens app, as outlined earlier.
Enable HTTPS on Canarytokens
As of this writing, Canarytokens’ support for enabling HTTPS is broken due to Certbot issues. The following steps won’t work until the issues are addressed.
If you’d like to enable HTTPS on your Canarytokens server, terminate your Canarytokens app. Then edit the certbot.env file in the ~/canarytokens-docker directory to specify the details the app will use when requesting a free TLS/SSL certificate from Let’s Encrypt.
Specify your Canarytokens domain name as the MY_DOMAIN_NAME parameter. Specify your email address as the EMAIL_ADDRESS parameter, which the app will provide to Let’s Encrypt when generating the certificate. (As noted above, make sure that you’ve registered the “www” alias for your Canarytokens domain before proceeding.)
Now, instead of using the command docker-compose up to start your Canarytokens app, use the following command from the canarytokens-docker directory:
docker-compose -f docker-compose-letsencrypt.yml upSupply the “-d” parameter at the end if you’d like to run the app in the background. In this case, you’ll use the following command to terminate the app:
docker-compose -f docker-compose-letsencrypt.yml downNote that every time you start up the HTTPS-enabled Canarytokens app, you’ll request a new certificate from Let’s Encrypt, which limits how many certs it will issue for a domain in a given period. If you frequently restart Canarytokens, you’ll reach your limit. If that happens, you’ll only be able to access your Canarytokens site using HTTP until you restart your app after waiting the appropriate time (probably about a week).
Experimenting with Honeytokens
Honeytokens can help you detect malicious attempts to interact with our data, infrastructure and applications. Since legitimate users should not be interacting with these honeypot resources, any activity associated with them is suspect, offering an intrusion detection and threat research method with a relatively low rate of false positives.
Canarytokens offers a convenient way of starting to experiment with honeytokens without too many difficulties and with an attractive value proposition. Give them a try—see what you learn.